All Natural DIY Bronzer

Okay...I have been wanting to try this for sometime and have seen a lot of versions on the internet..some look good and some look crazy, I finally broke down to try it! You see, In the past few months, I have made the switch to chemical free cosmetics and body care. I totally began realizing that my skin is a conductor not a barrier. Here I am working so hard to keep chemicals out then slathering them on my face and skin only to be absorbed! I even found out that there are certain chemicals found only in makeup that can be transmitted from a pregnant mother to her unborn child! Don't worry, I am not starting a rant about it but it did bring home the need for me to go chemical free. I began by buying organic and vegan items at the store but found  it was certainly not budget friendly!

This DIY bronzer powder is handmade by YOU! So...if you get a little tan on, you can simply darken your powder. I am going to leave the amounts of the ingredients up to you as you know your skin color the best. Just play until you get the right amount.

As I mentioned, there are a lot of different versions of this recipe out there...some involve powdered sugar as the base. I am not certain that I should put sugar on my face! if it breaks me out when I eat it.....Anyway..my version uses cornstarch. Cornstarch can be used as an oil fighting powder and has actually helped in clearing acne when used daily. So...I thought what better to use for this All-Natural Bronzer!

It has an amazing scent and  is amazingly cheap! I bet a whole container of this costs about 50 cents when you add it together!

cocoa powderIngredients:
  • Cornstarch
  • Cinnamon (the finer the better) - Gives some glow and glitter
  • Cocoa Powder


Now...I have heard that if you add some essential oils to your blend, you can pat it down into a recycled  compact and have more of a pressed powder! I haven't tried it since the bronzer is working well for me in the powdered form. For about 5 tablespoons of powder, use 10-15 drops of essential oil. Then pack firmly into an empty compact. Allow to dry overnight or at least a few hours.

ALSO - If you are looking for an all natural liquid bronzer---add cocoa powder and cinnamon to a cup of white lotion. Make it your desired color and spread onto your body. NOW...some people say this is a self tanner...I tried it as such and wasn't impressed. It isn't waterproof so I don't say it "tanned" me. But it was a nice glow similar to other lotions on the market.

Directions:
  1. Add your ingredients together. You will start with about 2 tbsp of cornstarch. To that add less than 1 tbsp of cocoa powder and 1 tbsp of cinnamon. Blend these together and then add more cocoa powder if needed. Everyone has their own color so I would start here then build up!
  2. Test it on your skin before adding more! 
  3. When APPLYING...BE GENTLE! This is a pretty color saturated item so you will start with a soft whisp of color and then blend. Use a large brush to apply in a circular motion for best results. 
Enjoy your new All-Natural Bronzer and your cocoa inspired glow! If you have any other all-natural tips or beauty secrets...please share!

Check out some of my other all natural recipes!


DIY All-Natural Slimming Body Scrubs - 2 ways! 

Check out some organic makeup available from Walgreen's Online Store!
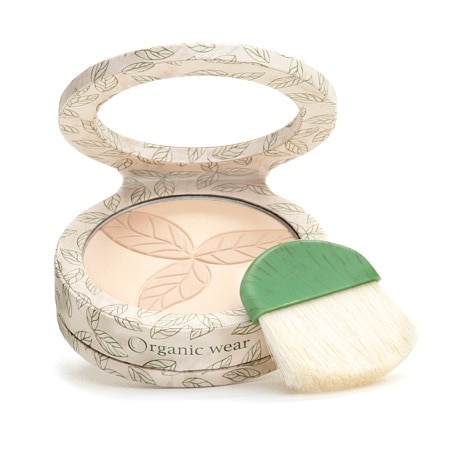
Physicians Formula Organic Wear MakeupBlum Naturals Daily Cleansing & Makeup Remover Towelettes, Dry & Sensitive Skin contains Organic Chamomile ExtractBlum Naturals Daily Eye Makeup Remover contains Organic Cucumber Extract OR....Try shopping at Amazon!

All Natural DIY Haircare - I No poo?!?!

How $1.50 saved my hair!

Okay, when I first started reading about my friends who "no-poo", I totally thought that they were giving me more information that I needed to know.

I FINALLY urged myself to click the link and see what this craze was all about. Thankfully (and to my surprise), they were talking about haircare and SHAMPOO! My first thought was ewwwww (sorry, the honesty card is out). Since I am working on getting my family a little greener, I did transition to organic shampoo and conditioner recently -but yikes...it was pricey for this cheap gal (not pricey for most people...about $7 per bottle). My friends were singing no-poo praises and it was super cheap so why not try it....right?!?!?

So what is "no-poo" all about anyway? Well, it is basically a term for giving up shampoo. It seems to be a hot trend now with more and more people looking to rid their lives of unecessary chemicals.I too have been ridding my diet and now my beauty routines from chemicals but buying the organic shampoos and conditioners at the store was not budget friendly. So, with 2 items in my arsenal...I embarked on a mission that I thought would be a sure fail (sorry blogger buddies- I thought you were wrong).

Did you Know?
  • Until the late 1930s, women did not use shampoo! 
  • In the early 1900's women used bar soap to wash their hair about every other week!
My story of getting the poo out!

Let me give you a bit of history of my hair. About 6 months ago, I thought it would be a great idea to go from jet black hair to bright blonde. I went to the beauty school (remember, I am cheap) and had it bleached. My hair was not in too bad of shape after that so when it was time for my roots to be done...I tried to go it alone. BIG-BAD-MISTAKE! I did the roots as well as the rest of my hair to brighten the color and ended up with hair resembling straw. Actually...I WISH it was like straw. It was worse. I had big patches of missing hair where my hair simply burned off. Running a brush through my hair produced fistfuls of damaged hair. When I washed my hair...it took HOURS to air dry (at least 5). My hair simply was one thing- shot. For the girl who always thought I could do anything to my hair...I had met my match.

I tried fancy conditioners and even had a conditioning treatment done at the salon....no luck.The only thing that helped was a homemade mayonnaise hair mask ( my homemeade mayo recipe here- it is so easy to make and chemical free).  With the failure rate of commercial conditioner,  I really wasn't giving this "no-poo" thing a vote of confidence but I had to try it. I can honestly say...I was wrong! For the first time (in a long time) my hair is healthy, shiny, and has TONS of volume - more than ever before.

Here is how and why it works:

Traditional shampoos are really just detergents. They use chemicals to strip your hair and scalp of dirt and oils. While this sounds like a good thing, the  Shampoo strips the hair and your scalp of sebum (natural oils created by your scalp). This is why you then use conditioner - to replace the natural oils in your hair that your shampoo has stripped away.

The no-poo hair care method uses baking soda and vinegar. Since baking soda is not a detergent the natural oils are not stripped away. This makes your hair naturally healthy  (notice that I did NOT say greasy). Your scalp will now be balance will produce less oil! It was only producing so much because you were stripping it away with chemical shampoo!  Some people say that they go a whole week without washing!

Some perks of this super frugal and natural way to care for hair....
  • Your hair will have more body
  • Your scalp will produce less oil
  • Shiny  and silky hair
  • Its GREEN haircare!
  • Super cheap
  • My hair is now "behaving"! Really, it is!
  • I had damaged hair that was chemically processed so I would say that it is definitely safe!

So...you want to start no-pooing?

Here is something that I somehow missed. You should buy 1 last bottle of commercial shampoo. It needs to be a clarifying shampoo. Suave Daily Clarifying Shampoo, Normal to Oily Hair is a great one that costs only $1!  Use this for about 1 week to begin getting rid of the silicone left behind from your old shampoo and it will make your transition to no-poo smooth! (I did NOT do this and had a week of evil).

If you are a stay at home mom and don't mind your hair being a little yucky for a week or two..you can start no-pooing immediately. I did and the first few washings were not pretty. PLEASE....stay with it and give it a chance. It took about 2 weeks for my hair to look and feel awesome. Yesterday, it air dried in just an hour :)!

Photo Ready to Start...or stop 'pooing?

You only need a few things !

  • Baking Soda 
  • Vinegar ( I use apple cider)
  • Squirt Bottles (I reused bottles :)
  •  Essential oil (if you want to scent your cider- mine cost only a few dollars!)


Instructions:

MAKE YOUR NEW HAIR CARE PRODUCTS!
  1. Create a solution of baking soda and water – add 1 TBS of baking soda to 1 cup of water. Completely dissolve the baking soda.
  2. Create a rinse of vinegar and water – 2 TBS of vinegar to 1 cup of water. If you want to add a few drops of essential oil to this, you can! The vinegar smell honestly does go away after a few minutes so it isn't necessary.
These will last you maybe 2 washes depending on how much hair you have. I make BIG batches! I spent $1.50 on a bottle on vinegar and a box of baking soda and those are going to last a LONG time!

NOW START USING THEM!
  1. WASH: Wet hair and then apply the baking soda solution to the roots of your hair massaging it into your scalp with your fingertips in a circular motion.  This will not lather up like soap! That doesn't mean it is not working! Leave it on for a minute or two until it starts to feel slick.  Most people say not to add this to the entire length of your hair but I do. That is up to you! Now rinse.
  2. TO CONDITION: Put the cider vinegar rinse on all of hair paying the most attention to the ends. Leave it in fora minute or so then rinse!
That's all. These two things have saved my hair! I am actually surprised that I am finding out that many items I have in my refrigerator are actually miracle workers on my skin and on my hair. 
If you want to check out more...
8 Beauty Reasons to Add Coconut Oil to your Beauty Routine 
Homemade All-Natural Slimming Body Wrap 2 Ways - Cost about $2 per wrap..if that!
Homemade Cellulite Busting Vanilla Latte Body Scrub

Won't you no-poo with me?

I plan to bring you some more all natural and organic beauty tricks soon! I also will be sharing some other no-poo methods and organic hair care conditioners and enhancers!

If you want to try chemical free hair care too but just aren't ready to plunge into the Baking Soda and Vinegar...Check out Walgreens Green Shop! They carry many brands of all natural and organic hair care and personal items! You get FREE SHIPPING on all orders over $25!

Also Check out:

JuiceBeauty.com C.O. Bigelow

Organic Makeup from Sappho Cosmetics


If you have been following along with my blog, you know that I have worked very hard over the last 8 months to get my family a bit "greener". We started with cleaning supplies, moved to food, and I am now working on "greening" our health care and beauty items. Little did I know, this was easier said than done.


Finding GREAT organic beauty products is NOT as easy as it sounds. When going to the "big box" stores, you will find brands who try to LOOK Organic but are not! Because there are no legal definitions of what "green" or "natural" makeup is, the companies deceive you by adding pretty pictures of flowers and plants to the packaging or by adding the word "natural" to the label. All you have to do is flip the package over to see that the chemicals and additives are still there.

So, I did as I always do and went for a little hunt on the internet. I was immediately drawn to the Sappho Cosmetics site! Who knew I was so hip btw?....Jennifer Beals, Instyle Magazine, and many other beauty all-stars are raving about Sappho- I am OFFICIALLY A COOL KID!

So Why Go Organic With Your Makeup?
Your skin is the largest organ in your body. Although we may treat it as if it is, your skin is NOT a barrier. It is a conductor and absorbs everything you put on it. The chemicals found in our beauty routines are brought into the body and are even passed to unborn children while in the womb! In our makeups, you will find things like lead, quatramine 14 (which forms formaldehyde in your body), parabens (Evidence suggests that parabens are linked to various cancers), and many other harmful chemicals.You can read more about the chemicals and additives HERE.

Why Sappho?
First, their "tagline" is "Makeup Fearlessly" and the word fearlessly describes my motto for life. In addition to their promises (shown below and taken directly from their website), all of their products are vegan! I was sold! If you are a tiara and trophy kinda gal...Sappho is winning them right and left and being featured in magazines all across the globe!

Sappho Organics promises to:

  • support all efforts to be original in art, music, fashion and life;
  • fully disclose our ingredients; to use only the purest, cleanest and healthiest ingredients available.
  • because people vary and because of environmental stresses we promise to create more conscious awareness of your experience with our products. To that end if you have sensitivities to aloe vera, jojoba oil, essential oils, iron oxides or mica  or have a depressed or compromised immune system,  we recommend introducing our products slowly by starting with a sample or patch test
  • minimize our footprint as we grow; and
  • remain a positive influence in this world.
So What Did I think?

I am absolutely in LOVE. To be honest, I was a bit leery at first because this was my first journey into "green" makeup. I had no idea what to expect and the prices were higher than I typically paid for my makeup - hello dollar store. I am here to say that I will NEVER buy makeup anywhere else. I use way less foundation than I did of the cheap stuff and my skin is thanking me by the day! It feels softer, smoother, and even looks better with and without the makeup on.

My absolute FAVORITE item is the "Undo" concealer. A small dab under each eye conceals bags, hides wrinkles, and really gives a refreshed look to my face. I was going to post a before and after picture but my 5 year old daughter advised me against it. She said no one wanted to see my before photo, so you are just going to have to take my word for it. I assure you, she is a very wise girl! A little "undo" goes a long way so this little container of miracle cream will last you for a long while!

I also love that their website gives you some amazing tips and tricks for make-up application! You can find some of them HERE. The other tips can teach you how to make lips look fuller, accentuate your eyes, or even how to manage NOT to make your nose look bigger! These are welcomed tips for someone who has not been "cool" since having kids 9 years ago.

I could go on and on about how much I love Sappho's products but will spare you my babbling! The company has a real affinity for beauty and a passion for the environment. Even the packaging is eco-friendly!

They even speak to my frugal side with a few specials!
Magnetic Compact  Special
Buy 3 pressed Eye shadows and get a FREE magnetic eco-friendly compact HERE


Take a few minutes and check out the Sappho site as well as the links I have shared. I am confident that after a few more weeks of this amazing make-up, I will be ready to share that before picture with the world!

*This post was not paid for in anyway by Sappho cosmetics. They did provide to me make-up to sample and review. All opinions expressed within are completely my own and can not be influenced by any company.


Low Carb Gluten-Free Pasta from Quest Nutrition!

I was like a kid in a candy store waiting for my Shipment from Quest Nutrition. My family recently embarked on a cleaner eating path and that eliminated most "snack" bars and sadly a large majority of the protein bars on the market. When I found out about Quest nutrition, I KNEW that I had to find out more! They actually have an all natural line that contain no artificial sweeteners, no junk, no glycerin, and are gluten free!In fact...all of their snack bars are Gluten-free!

I received a sample pack filled with 12 different flavored protein bars, 2 packs of their peanut butter cups,  as well as 2 of their pastas. They were all awesome -but today, I want to focus on the pasta because I was truly amazed!

The pasta is gluten free AND low CARB! Plus it has only 3 ingredients! No JOKE!  And it is actually really good! The Quest Nutrition Pasta comes in 2 different styles, spaghetti and fettuccine. 
 I bet you are wondering how they make LOW CALORIE, LOW CARB, GLUTEN FREE PASTA...right?!?!?

It is actually made from Konjac root (Glucomannan). Konjac root has been eaten for hundreds of years in  many Asian countries and is revered for its hunger reducing properties. So these noodles are super healthy?

But are they good?
Okay, honesty card is out....at first, I was SCARED! The pasta is packed in an alkaline water and if you have never smelled that before....it smells like seafood! I am an extreme vegetarian so this was an instant turnoff. LUCKILY the good people over at Quest have noted this on the package and even have a funny video on their website about it! So...I rinsed the pasta and the sea smell was GONE!
They actually taste pretty darn good! I used them to make a vegetable lo-mein. I flash boiled them for about a minute and I was good to go! 

Would I recommend the pasta?
I certainly would. I know that the pasta may not be certified organic but for those focusing more on the low carb or gluten free side of  diets...it is certainly one of the best alternatives that I have tried!

Check out some of their amazing Gluten-free snack bars!
Try Quest Protein Bars!


This post was not paid for in any way by Quest Nutrition. They did provide complimentary samples but in no way influenced nor asked for favorable reviews!

On Display Monday Link Party!!!

Just like in my twenties...I am turning out to be a party girl! I am so proud to be a party of the fun group of gals who put on the On Display Monday Link Party..each one of us brings something to the table...now, we are waiting for you to do the same!

Bring your DIY, recipe, craft, creation, and more!

DIY Slimming Body Wraps - 2 ways!

I am sure that you are all well aware of the slimming body wraps that are available on the market. The basis behind them is very simple and I have tried them and can say that they do work BUT spending a hundred bucks or so a month for maintenance - not in my budget!

So, I did what I know how to do...I researched and found a way to get the same results by doing it myself! I now can wrap as much as I want a month for a fraction of the cost of 1 of the popular wraps! Now, please know that I am not knocking the wraps....I clearly tried them and like them.  They provide a great result and are filled with lots of natural goodness but the price just isn't right for me.

Here is how I got the popular "slimming wrap" results at home. The basis behind my at home wraps is easy...the salt in the rub seeps into your body through the skin resulting in your body forcing out unnecessary water. The added bonus in my version is that the caffeine from the tea will help fight cellulite! It is NOT a get slim quick fix...just an extra boost to make your jeans fit a little better. The best part is that you can wrap any area of your body that you would like! Your arms, legs, thighs, and belly! Sorry, I will NOT be posting before and after pictures...you can thank me if you would like! I do not have results to hide...just some stretch marks and a few extra pounds :)

Now..I have included all of the ingredients for you in the recipes. You can add any essential oils you would like. You can also save yourself some time and order a scrub from my Etsy shop! Many of my scrubs can be used in place of these items so you will NOT have to buy anything! 15% off items for my readers at my Esty Shop using code ETSYROCKS. I will gladly answer any questions you have and can alter any recipe to be used for the slimming wrap! HERE IS MY ONLINE STORE!

Version 1:

Here is what you need:
  • Ace bandage or some type of fabric that can absorb water and be wrapped around the body. Heck...I am so cheap that I used an old pair of blue jeans and cut straight down the legs to make nice long strips! PERFECT!
  • The "recipe" - basically you will need - water, tea bags, salt, and coconut oil (or a moisturizer)
  • Saran Wrap - to lock in the  moisture and body heat!
  • Some time. You can sleep in this or simply wear it around the house...up to you!
The Recipe: You will see different versions of this online. Some call for clay or any white lotion. I chose coconut oil because of its organic, moisturizing, and natural healing properties. You can certainly select to use a lotion in its place.
  • 2 cups of water
  • 3 tea bags (I chose green tea)
  • 1/4  cup sea salt
  • 2 tbsp coconut oil  
  • 8 ounces of water
Directions:
  1. Bring 2 cups water to boil with most of the salt and tea bags.
  2. Drink the 8 ounces of water before wrapping
  3. Let water boil for about 2 minutes then allow it to begin cooling
  4.  While the water is boiling, combine the remaining salt (about 2 tbsp) with the coconut oil and massage into the area(s) you are treating. 
  5. Unroll the ace bandage and soak it in the salt water concoction and allow it to soak up the liquid. 
  6. Tightly wrap affected areas with the ace bandage (make sure the water is NOT SCOLDING but is still warm! You want it to be warm to open up your pours!
  7. Follow up by wrapping the bandaged areas with saran wrap. This will lock in the moisture and your body heat!!
  8. Go about your business! Wrap before bed or while you are hanging out. Unwrap a few hours later and check out your results!

Alternative Version:

Items needed:
  • Coconut oil (any white lotion will work)
  • 1/4 cup of sea salt
  • ace bandage
  • saran wrap
  • 8 ounces of water (to drink!)
This is a much easier version of the "slimming wrap". Drink a glass of water before wrapping!
  1. Simply add the salt and coconut oil together. 
  2. Massage into areas needing treatment. 
  3. In this version, you will wrap with saran wrap FIRST to lock in your body heat! 
  4. Then, wrap the areas with the ace bandage to hold the saran wrap in place. A girdle helps to hold this in place if you have one :)
If you use this version, I recommend doing some housework or light exercise to increase your body temperature and really open up the pores. I suggest this be worn for a few hours or overnight!

Now...I have to be honest, I did get better results with the first version. I found myself going to the restroom every 15 minutes! if I am in a time crunch though, I like version number 2. I DID get results with BOTH!

IF YOU ARE READY TO WRAP...CHECK OUT MY ETSY SHOP! I have two great scrubs that can be used in conjunction with the wrap!Simply rub it in and wrap away! Both my organic Vanilla Latte Cellulite reducing scrub and my all natural herbed lemon salt scrub can be used for wrapping! I am offering 15% off for my readers with code ETSYROCKS! Click HERE to check them out!

Let me know if you have tried either version and the results you found. Again...I AM NOT knocking the fancy schmancy ones, I liked them actually but can not afford the maintenance. I hope that these tricks help save you money and that you catch some results!


Homemade Organic Vanilla Latte Cellulite Reducing Scrub

Now...I know the words "cellulite reduction" got you to read so I am going to disclose in advance that this will not ELIMINATE cellulite...but, coffee has been used for and sworn by to reduce cellulite in many cultures - so, why not try it! It appears to have originated in Africa and stars like Halle Berry sing it's praises and I don't see any cellulite there- so I am in!

If you are a follower, you know that I am not only trying my best to be organic but that I am also committed (forced) to live frugally so buying an expensive cellulite treatment is NOT in the cards for me. So, I did as I always do and took to the internet. I was pleasantly surprised to see that there was a super easy cellulite reducing remedy that I could make at home with ingredients that I already have---SCORE!

This vanilla latte scrub smells AMAZING and is perfect for toning and tightening skin.

How does it work?
Caffeine has been used for years as a topical treatment for cellulite. It causes the blood vessels to dilate which increases speed and volume of blood flow. This helps to remove extra water from our tissue causing firmer skin! It will not ELIMINATE your cellulite but you will notice a difference!

The best part is that it is SUPER easy to make! It's also pretty easy on the wallet!

**SUPER FRUGAL TIP---You can actually use your coffee grounds AFTER you brew your coffee! Used grounds technically cost you nothing!

***SUPER EASY TIP--Let me do it for you! This scrub is available at my Etsy store for only $8.99. If you use code ETSYROCKS, you will get 15% off!  
Click here to see this and other items at my All-Natural Emporium!


INGREDIENTS:

1 cup organic coffee
1 cup organic sugar or salt
1/2 cup organic coconut oil (any oil will work)
1 Tbsp organic vanilla

Directions:
Blend all of the ingredients together. Store in sealed glass container.


Now..the glamorous part! 
Definitely use this in the bathtub! 

Gently rub into skin. I have heard of people using this on their face but I think it may be a bit too harsh for faces but if your skin isn't as delicate as mine, I hear it leaves your face feeling awake and toned. Use your own judgement there! The coffee and sugar will gently exfoliate while the coconut oil goes to work moisturizing and leaving your skin smooth and refreshed. Rinse clean and enjoy you soft skin!

Now for the truth: You will probably NOT see results day 1 but you are on your way to more toned skin AND you smell amazing!

I hope you enjoy your scrub and your baby soft skin! Do you have a favorite DIY scrub? I would love to hear about it!

If you LOVED this, click here to read about why I am Co-Conutty for Coconut and its 8 beauty  uses!

Linked to The Hope In Every Season Homemaking Party
Linked up to Thank your Body Thursday 
BLOG DESIGN BY DESIGNER BLOGS